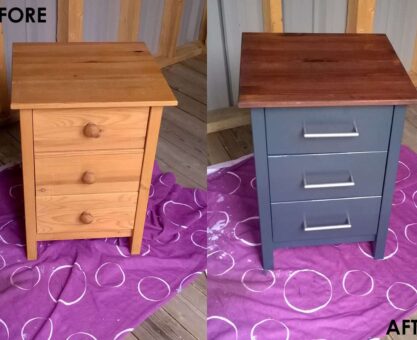
Revamping your space doesn’t always require buying new furniture. In fact, learning how to paint timber furniture is a fantastic way to breathe new life into old wooden pieces. It helps you save money and adds a personal touch to your home décor. Whether you’re restoring a cherished heirloom or updating a second-hand find, painting timber furniture is satisfying and cost-effective.
This guide will walk you through each step of the process. We’ll cover choosing the best paint for wooden furniture and sealing painted wood furniture for long-lasting results. You’ll also learn how to prepare timber for painting and how to sand wooden furniture before painting. Plus, we’ll offer plenty of DIY furniture painting tips along the way. So, grab your tools—let’s get started.
Why Paint Timber Furniture?
Timber furniture is timeless, sturdy, and usually expensive when bought new. However, over time, even the best-made wooden pieces can become scratched, worn, or look outdated. Painting timber furniture gives you a sustainable and stylish alternative to replacing it.
Some key benefits include:
-
Cost-effective makeovers: A fresh coat of paint is much cheaper than buying new furniture.
-
Customisable style: Choose colours and finishes that match your décor perfectly.
-
Preserving quality pieces: Keep solid wood furniture in use instead of replacing it with lower-quality items.
Tools and Materials You’ll Need
Before you begin, gather these essential supplies:
-
Sandpaper (various grits)
-
Cleaning cloths and degreaser
-
Wood filler (if needed)
-
Primer suitable for timber
-
Paint (latex, chalk, or enamel)
-
Paintbrushes and rollers
-
Dust mask and gloves
-
Sealer or top coat
Having everything ready makes the process easier and more enjoyable.
Preparation is key. Getting timber ready for painting helps your finish last longer and look more professional.
-
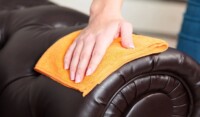
Clean the Surface
Use a degreaser or sugar soap to remove dirt, grime, and wax. A clean surface helps the paint stick and avoids problems like bubbling or flaking. -
Inspect and Repair
Look for dents, cracks, or holes. Use wood filler to fix imperfections and let it dry fully before sanding. -
Remove Hardware
Take off knobs, handles, and hinges. This makes it easier to paint and gives you a neater result.
Sanding is essential. It smooths the surface and helps the primer and paint stick better.
-
Start with coarse sandpaper (around 80 grit) if the furniture has old paint or varnish.
-
Move to finer grit (120–180) for a smooth finish.
-
Wipe the furniture with a damp cloth to remove dust after sanding.
For detailed carvings, use a sanding sponge or fine steel wool.
Priming helps the paint last and creates a consistent finish.
-
Use a primer that suits your paint type.
-
Apply it with a brush for detail or a roller for flat surfaces.
-
Let it dry according to the manufacturer’s instructions.
Priming also stops wood tannins from bleeding through and staining your paint.
Choose paint based on the finish and durability you want. Here are some options:
-
Chalk Paint
Great for a rustic or vintage look. It needs minimal prep but must be sealed. -
Latex Paint
Water-based and easy to clean. It gives a smooth, modern finish and works well with primer. -
Enamel Paint
Very durable and perfect for high-use items like dining tables or kitchen chairs It gives a glossy, hard finish.
For colour, think about your space. Neutrals are versatile. Bold colours add character.
Now you’re ready to paint.
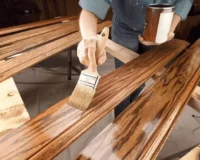
-
Apply Thin Coats: Start with a light coat. Build up slowly to avoid drips and get even coverage.
-
Use the Right Tools: Brushes are ideal for details. Rollers are best for large, flat areas.
-
Allow Drying Time: Wait 4–6 hours between coats, depending on the paint.
For a flawless finish, lightly sand between coats with 220-grit sandpaper. Wipe off dust before applying the next coat.
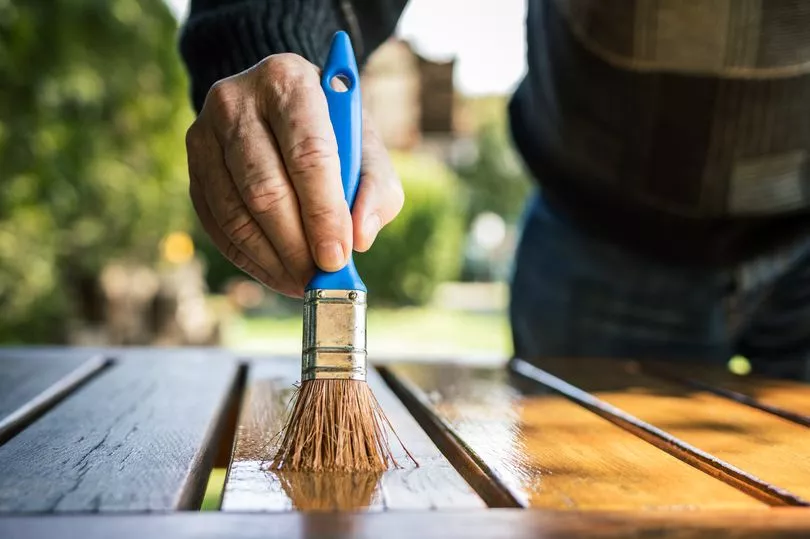
Protect your hard work with a topcoat. Sealing painted wood furniture improves durability. It guards against scratches, stains, and moisture.
Pick a sealer that matches your paint:
-
Polyurethane: Great for high-use furniture. Comes in satin, gloss, or matte.
-
Wax: Works well with chalk paint and gives a soft shine.
-
Water-based topcoats: Low odour and quick-drying compared to oil-based ones.
Apply thin layers. Let each layer dry fully before adding the next.
Additional DIY Furniture Painting Tips
-
Test Colours First: Try your paint on a hidden area before starting.
-
Work in a Dust-Free Area: Dust can settle on wet paint and spoil the finish.
-
Ventilate the Space: Always ensure good airflow, especially with oil-based products.
-
Label Drawers and Doors: Helps you reassemble quickly and correctly.
-
Be Patient: Taking your time ensures better results.
When repainting old wood furniture, follow these extra steps:
-
Remove old paint: Use a paint stripper if the old layers are thick or peeling.
-
Neutralise stripper: Clean the surface with water or a neutraliser.
-
Inspect for rot: Repair or sand damaged areas before painting.
-
Prime thoroughly: Old wood might need an extra coat of primer.
-
Finish carefully: Uneven surfaces need multiple thin coats for a smooth finish.
Final Thoughts
Learning how to paint timber furniture is a skill that can transform your interiors and reduce waste. Choosing the best paint for wooden furniture and sealing painted wood furniture the right way makes a big difference. With the right prep, tools, and techniques, even beginners can refresh and restore wooden furniture successfully.
Frequently Asked Questions
Can I paint timber furniture without sanding it?
Yes, but only if you use chalk paint or a bonding primer. Still, sanding gives the best and longest-lasting results.
What is the best paint for wooden furniture in high-use areas?
Use enamel or water-based polyurethane paint. Both are durable and offer a sleek finish.
How long should I wait between coats of paint?
Usually 4 to 6 hours. Drying time may vary based on temperature, humidity, and paint type.
Do I need to seal painted furniture?
Yes. A sealant protects the surface from chips and wear. It also enhances the colour and finish.
What are the steps to repaint old wood furniture?
Clean it, strip old paint if needed, sand, repair damage, apply primer, paint, and seal. These steps ensure a strong, even finish.